Search This Blog

Sunday, July 19, 2015

Beach chair~Tutorial

Hello! Angie again. I'm sorry I couldn't make the last post (Watermelon slice) into a tutorial. I thought I'd make it up to you by making something new! A nice beach scene! Let's get started.
Supply list!

Get two 4x8 pale colored plates, and push them together

Now, put a 2x1 plate with a hook on one side like shown in
the picture.

Like this!

Now get a light gray stud and place it in front of the 2x1 on the left.

Now get a 2x1x2 bent plate, (sand colored) and place it on top
of the three light gray pieces


Like this!

Now get two black 3x1 with a loop on one side (To snap into the
hooks) and push them together.

Now get a 2x4 flat plate and place it on the 3x1's

Flip it over, and on the lower part of the pink plate, and get a 2x3
and place it there.

Now get a 1x2 slope, use it as a pillow, and put it on the end of the
2x3 plate.

Now, snap your chair into the grey hooks.

Adjust your chair!

Now, get two dark grey studs, and connect them on top of each other.

Get one of these sticks and place it on top.

Now get a round piece (Having a design on it is totally unneccesary.)

Place it next to your chair.

Get a 1x2 flat plate an place it over here.

Here we go!
 
Well, that was fun! Make sure to complete our survey (Located on the top of the blog). It will only take a minute! Thanks!


Saturday, July 18, 2015

LEGO Watermelon! (Plus anwer to last Guess the Minifigure, or GtM)

(Note, from now on I will call Guess the Minifigure, GtM)
Hello Guys! Welcome back! No, I didn't die, I was just busy. We started school two weeks ago (We are homeschoolers)
Since it is summer, I  decided to make a LEGO Watermelon. I couldn't make it a tutorial because I had a problem with the pieces contrasting to the build. You couldn't see where each piece went, so I am just showing you what I made.

This is the watermelon slice. I was experimenting a lot
with the design awhile.

Another Angle

This is a double design! If you flip the melon slice over,
add a few leaves on top, it can be a strawberry!

Another angle

*Berry take camera from me*
Berry: Gotta take a selfie!
Me: Hey! Give me that! *Takes camera, and grabs Berry. Chews*

Me: *burps* Delicious! Sorry Berry.

Now for the answer to the last GtM!

X-Wing Pilot from SW Microfighter X-Wing!

Sunday, July 5, 2015

Guess the Minifigure!

I hope you all had an awesome Independence day yesterday! Maybe you watched fireworks, played with sparklers, etc. Now time for another game of Guess the Minifigure!

Oh! A pilot helmet

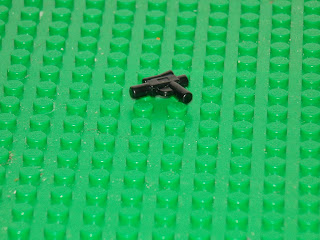
A blaster pistol.

And a... What is this?


Answer will be revealed in next post! Please take our survey (Located in a tab named Survey! On the top of our blog.) Gabe, signing off (This is my custom minifig.)

Thursday, July 2, 2015

LEGO City Great Vehicles 60057 Camper Van~ LEGO Review

Hello everybody! I have another review to share with you. It is now summer, the camping season, so I decided to do  review on my Lego City Camper Van!!!
I like this camper van, as it has many opening/closing/moving features.
 I hope you enjoy this!

Warning: some stickers from this set may be peeling/missing


The set
Accessories


Female Minifigure's Front
I call her Nya (from Ninjago) because she has Nya's hair

Nya's ( I am going to call her Nya, because it is shorter)
Left side

Nya's back

Nya's right side

 
Male Minifigure's front
I call him Jay (From Ninjago also) Because they also have the same
hair

Jay's left side

Jay's back

Jay's right side

Camper Van!

Camper Van: View from Front

View from right side

View from back

Cool Feature! The a piece of the left side opens up to look and play inside the van!

Ahh. Comfy bed

A TV next to the bed. It appears to be a fishing show. Perfect for camping

A small table and chair, with a stud for placing items, such as this mug.

Also, the top of this van easily comes off and on.
I use this feature a lot, as it is hard to get the minifigs in their seat
through the small doors.

Camper van view from top

A simple but cool detail. Side view mirrors!
It would be nice if the 2x1 slope for the mirrors were
see-through, though.
 

The front of the van from the top. Includes a blue driver's seat,
steering wheel, and coffee mug. It would be nice if there was a passenger side
seat.

Now for the top part of the van
 

This panel pulls up to reveal a storage area to
store the lifevests and oars for the canoe


I don't think this is designated for storage, but if I need some extra space
for stuff, I use this secret hatch

You could fill it with supplies,

Or you could use it as a roof top bed!

Now for the Canoe!

I think this is a cute detail to the set

Life vests: TO put them on, you have to take off the minifig's head,
slide the vest over the neck stick, and place the head on top.

the minifigure's head does not go down all the way though, if you
use the lifevest

(size difference: Left-lifevest
    Right-no lifevest)

SO Cute!!

Jay: Good-Bye!